
I’ve decided to occasionally have guest posts (occasionally should be read as whenever a friend volunteers). Here is my first, written by the amazing Sarah Layton.
Sarah Layton is an avid baker and meal-maker when the time, ingredients, and cravings all meet at the right time. She lives in Washington, DC, and can be stalked at @saraholinger.
I went camping a couple weekends ago and had leftover s’more supplies. After a quick, mouthwatering Google search for a recipe to use up dark chocolate, I chose to forgo ridiculous brownie/cake concoctions and decided to try my hand at candies. Still looking for something to do with those marshmallows…

Recipe adapted from here. I halved this recipe, but it was clear later that my office could have handled the full recipe with ease.
Ingredients (makes 24)
24 mini cupcake papers
Cooking spray
1 pound of dark chocolate chips (one regular 12 oz package probably works)
8 ounces creamy peanut butter (can get the basic jar in this size, I used Jif)
3/4 cups powdered sugar
3 tablespoons butter, melted
1 Ziploc sandwich bag
TIME: Depending on how pretty you want them to turn out, it should take approximately 30 min – 1 hour.

Can you tell I shop at Costco? I had to estimate the chocolate chips and peanut butter from my giant containers.
1. Place mini muffin papers in a mini muffin pan. You could also just put mini papers on a regular baking sheet, but this may be super annoying when you’re trying to spread the chocolate around and have nothing to push against. So I would definitely recommend the mini muffin pan.
2. Spray the papers thoroughly with cooking spray so the finished candies are easier to remove (I served mine still in the papers to avoid melting and, let’s be honest, the papers were pretty).
3. Melt the chocolate. The chocolate isn’t mixed with anything, so I recommend melting it in small batches so you don’t overuse or have to reheat. Use a small, microwave safe bowl to melt the first batch of chocolate, maybe half a cup.

4. Place half a spoonful of chocolate in each paper. Use whatever means necessary to push the chocolate up the sides (this creates the walls of the Reese’s). I used my fingers at first and burnt my fingers, so don’t do that! I then tried a toothpick to coax the chocolate up and around, but that wasn’t super efficient. A coworker who used to work in a candy shop (I know!) said they used popsicle sticks, which is genius and what I’ll recommend. Whatever you do, it’s tedious.
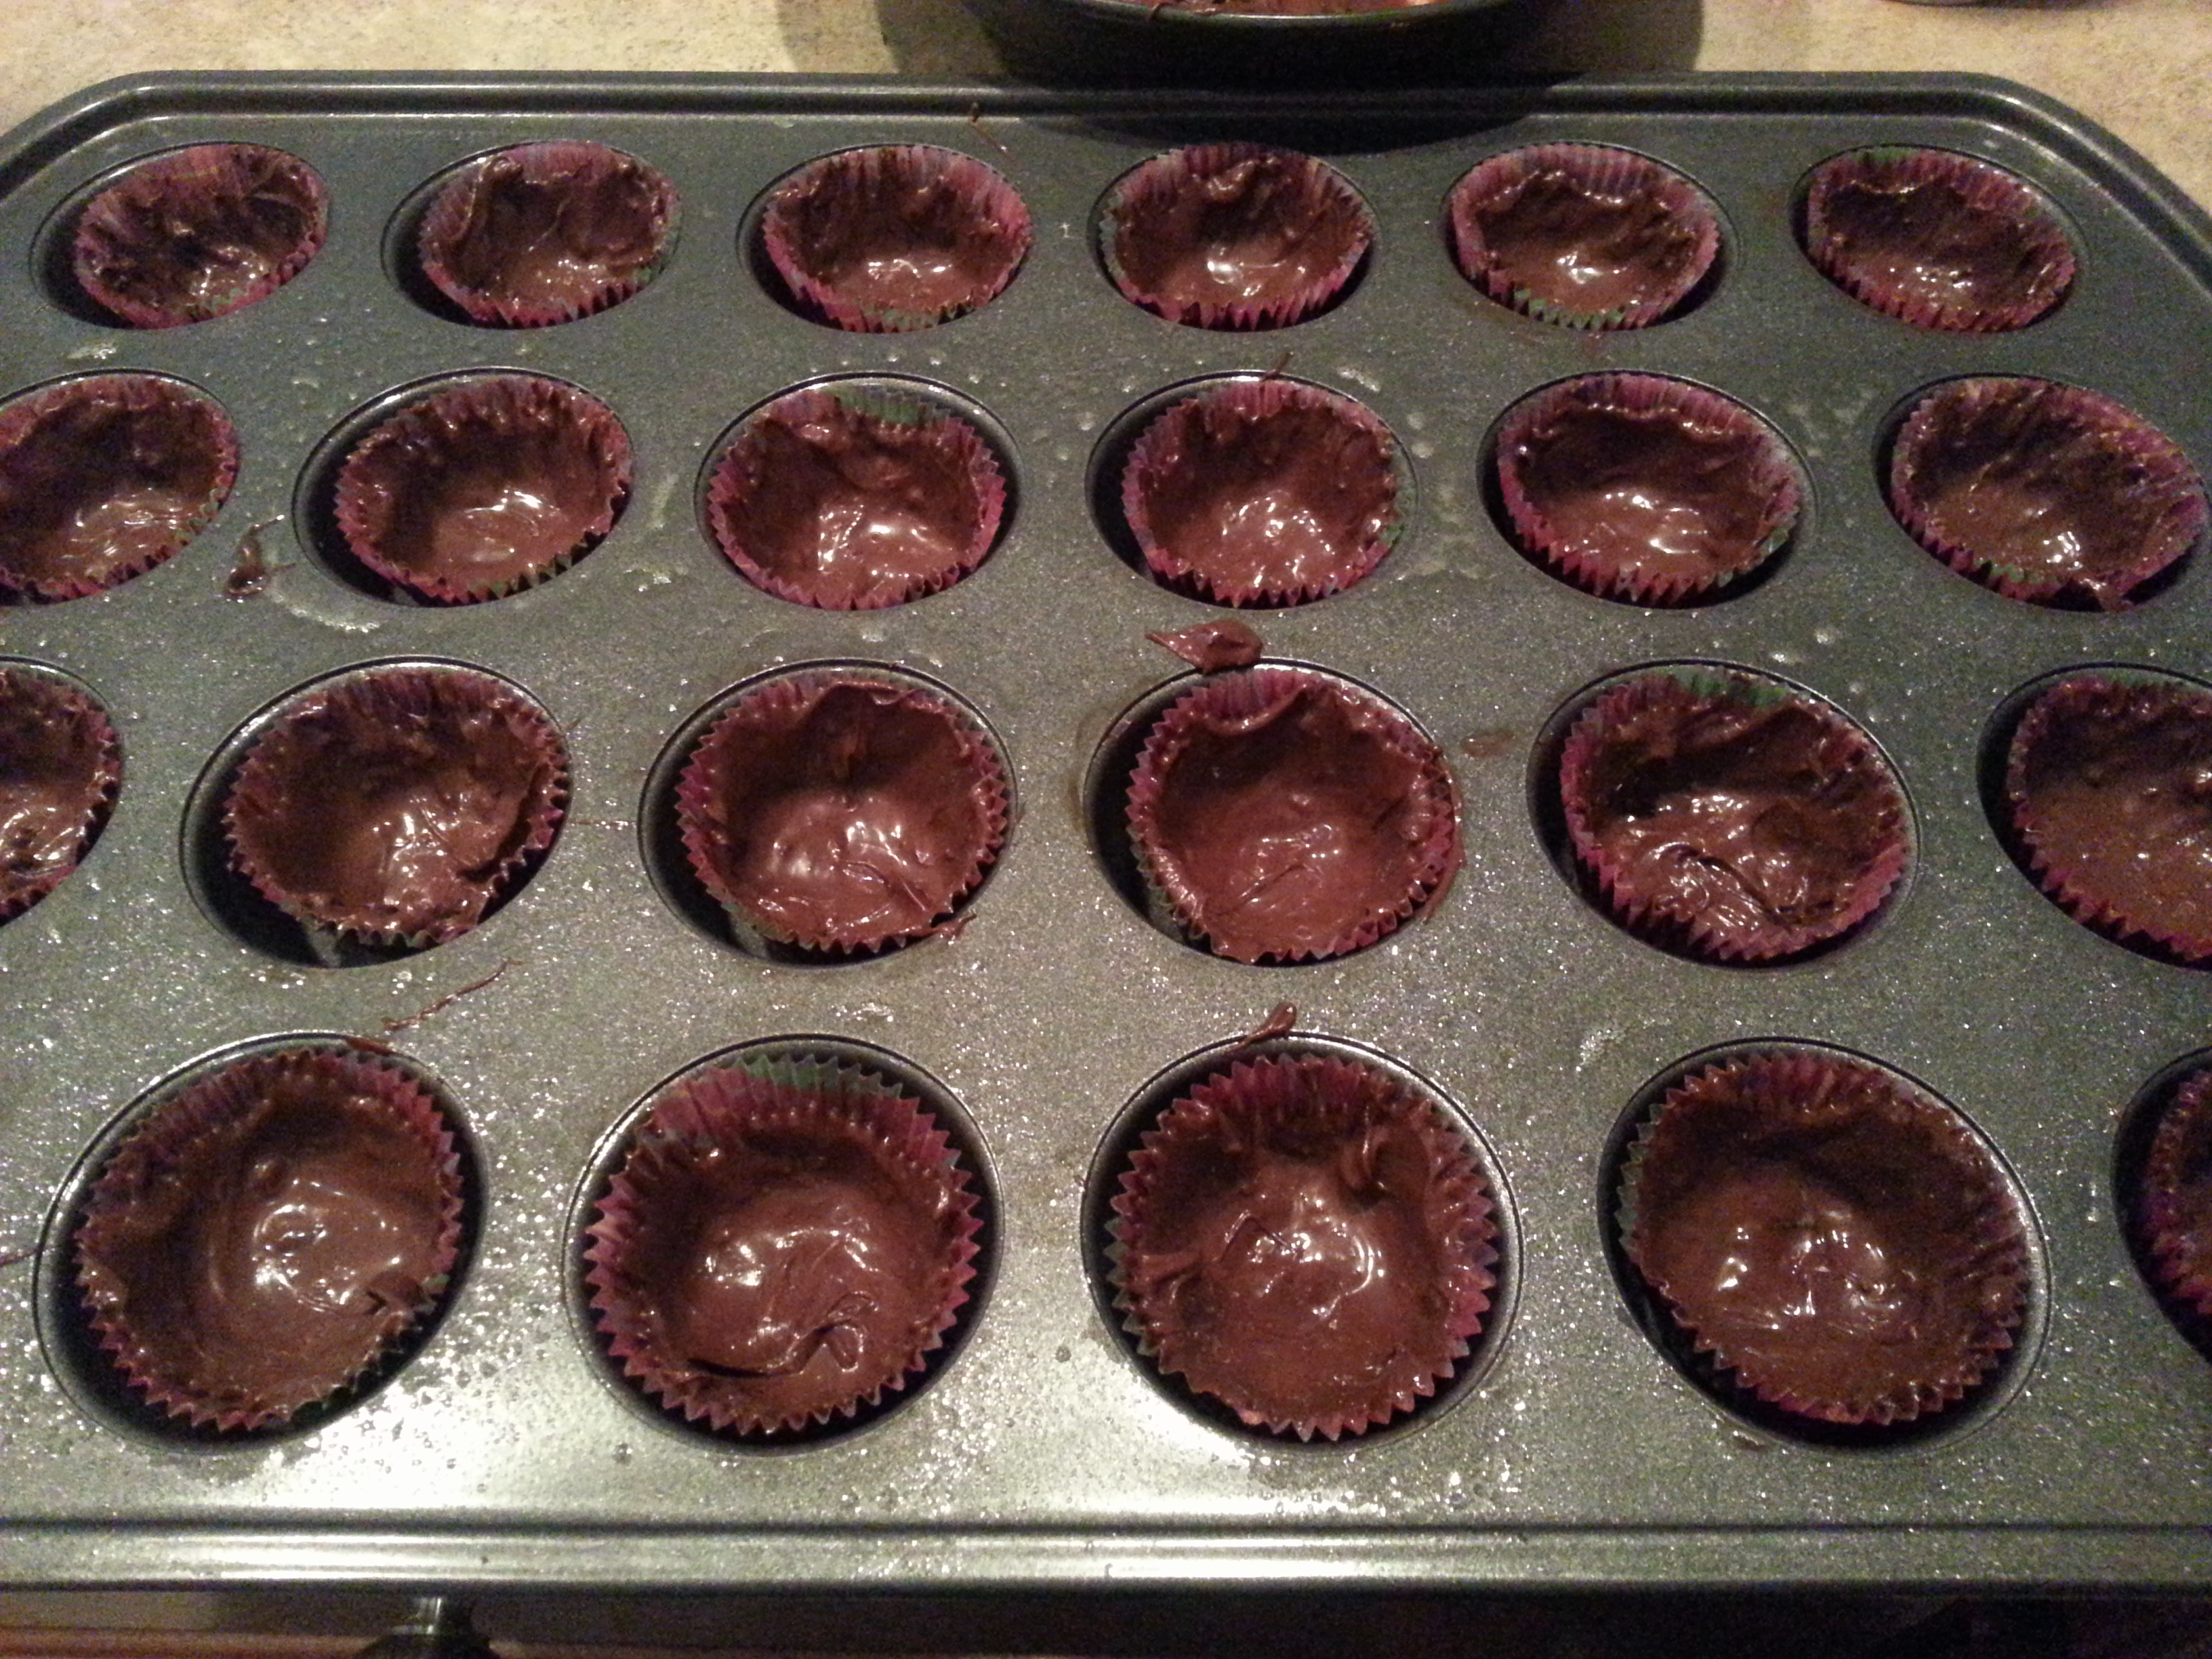
5. Put the muffin pan into the refrigerator to let the chocolate harden.
6. While the chocolate hardens, measure the peanut butter and powdered sugar into a bowl. Mix until blended. Then mix in melted butter until it’s smooth and creamy.


7. Get out a small, sturdy plastic bag (not those flimsy tiny snack bags, think Ziploc sandwich bag). Put it in a cup, with the open end draped around the edge of the cup (you can use a rubber band to secure it). Spoon the peanut butter mixture into the bag.

8. Pull the bag off the cup carefully and seal the top, making sure it’s totally closed. Shake down the peanut butter if necessary to make room for a good seal. Cut a small hole in one corner of the bag. I recommend starting small and then cutting more off if needed.

9. Remove your tray from the fridge and pipe the peanut butter mixture into each cup. Leave enough room so when the amount is smoothed down, it leaves enough room to put the chocolate on top without overflowing
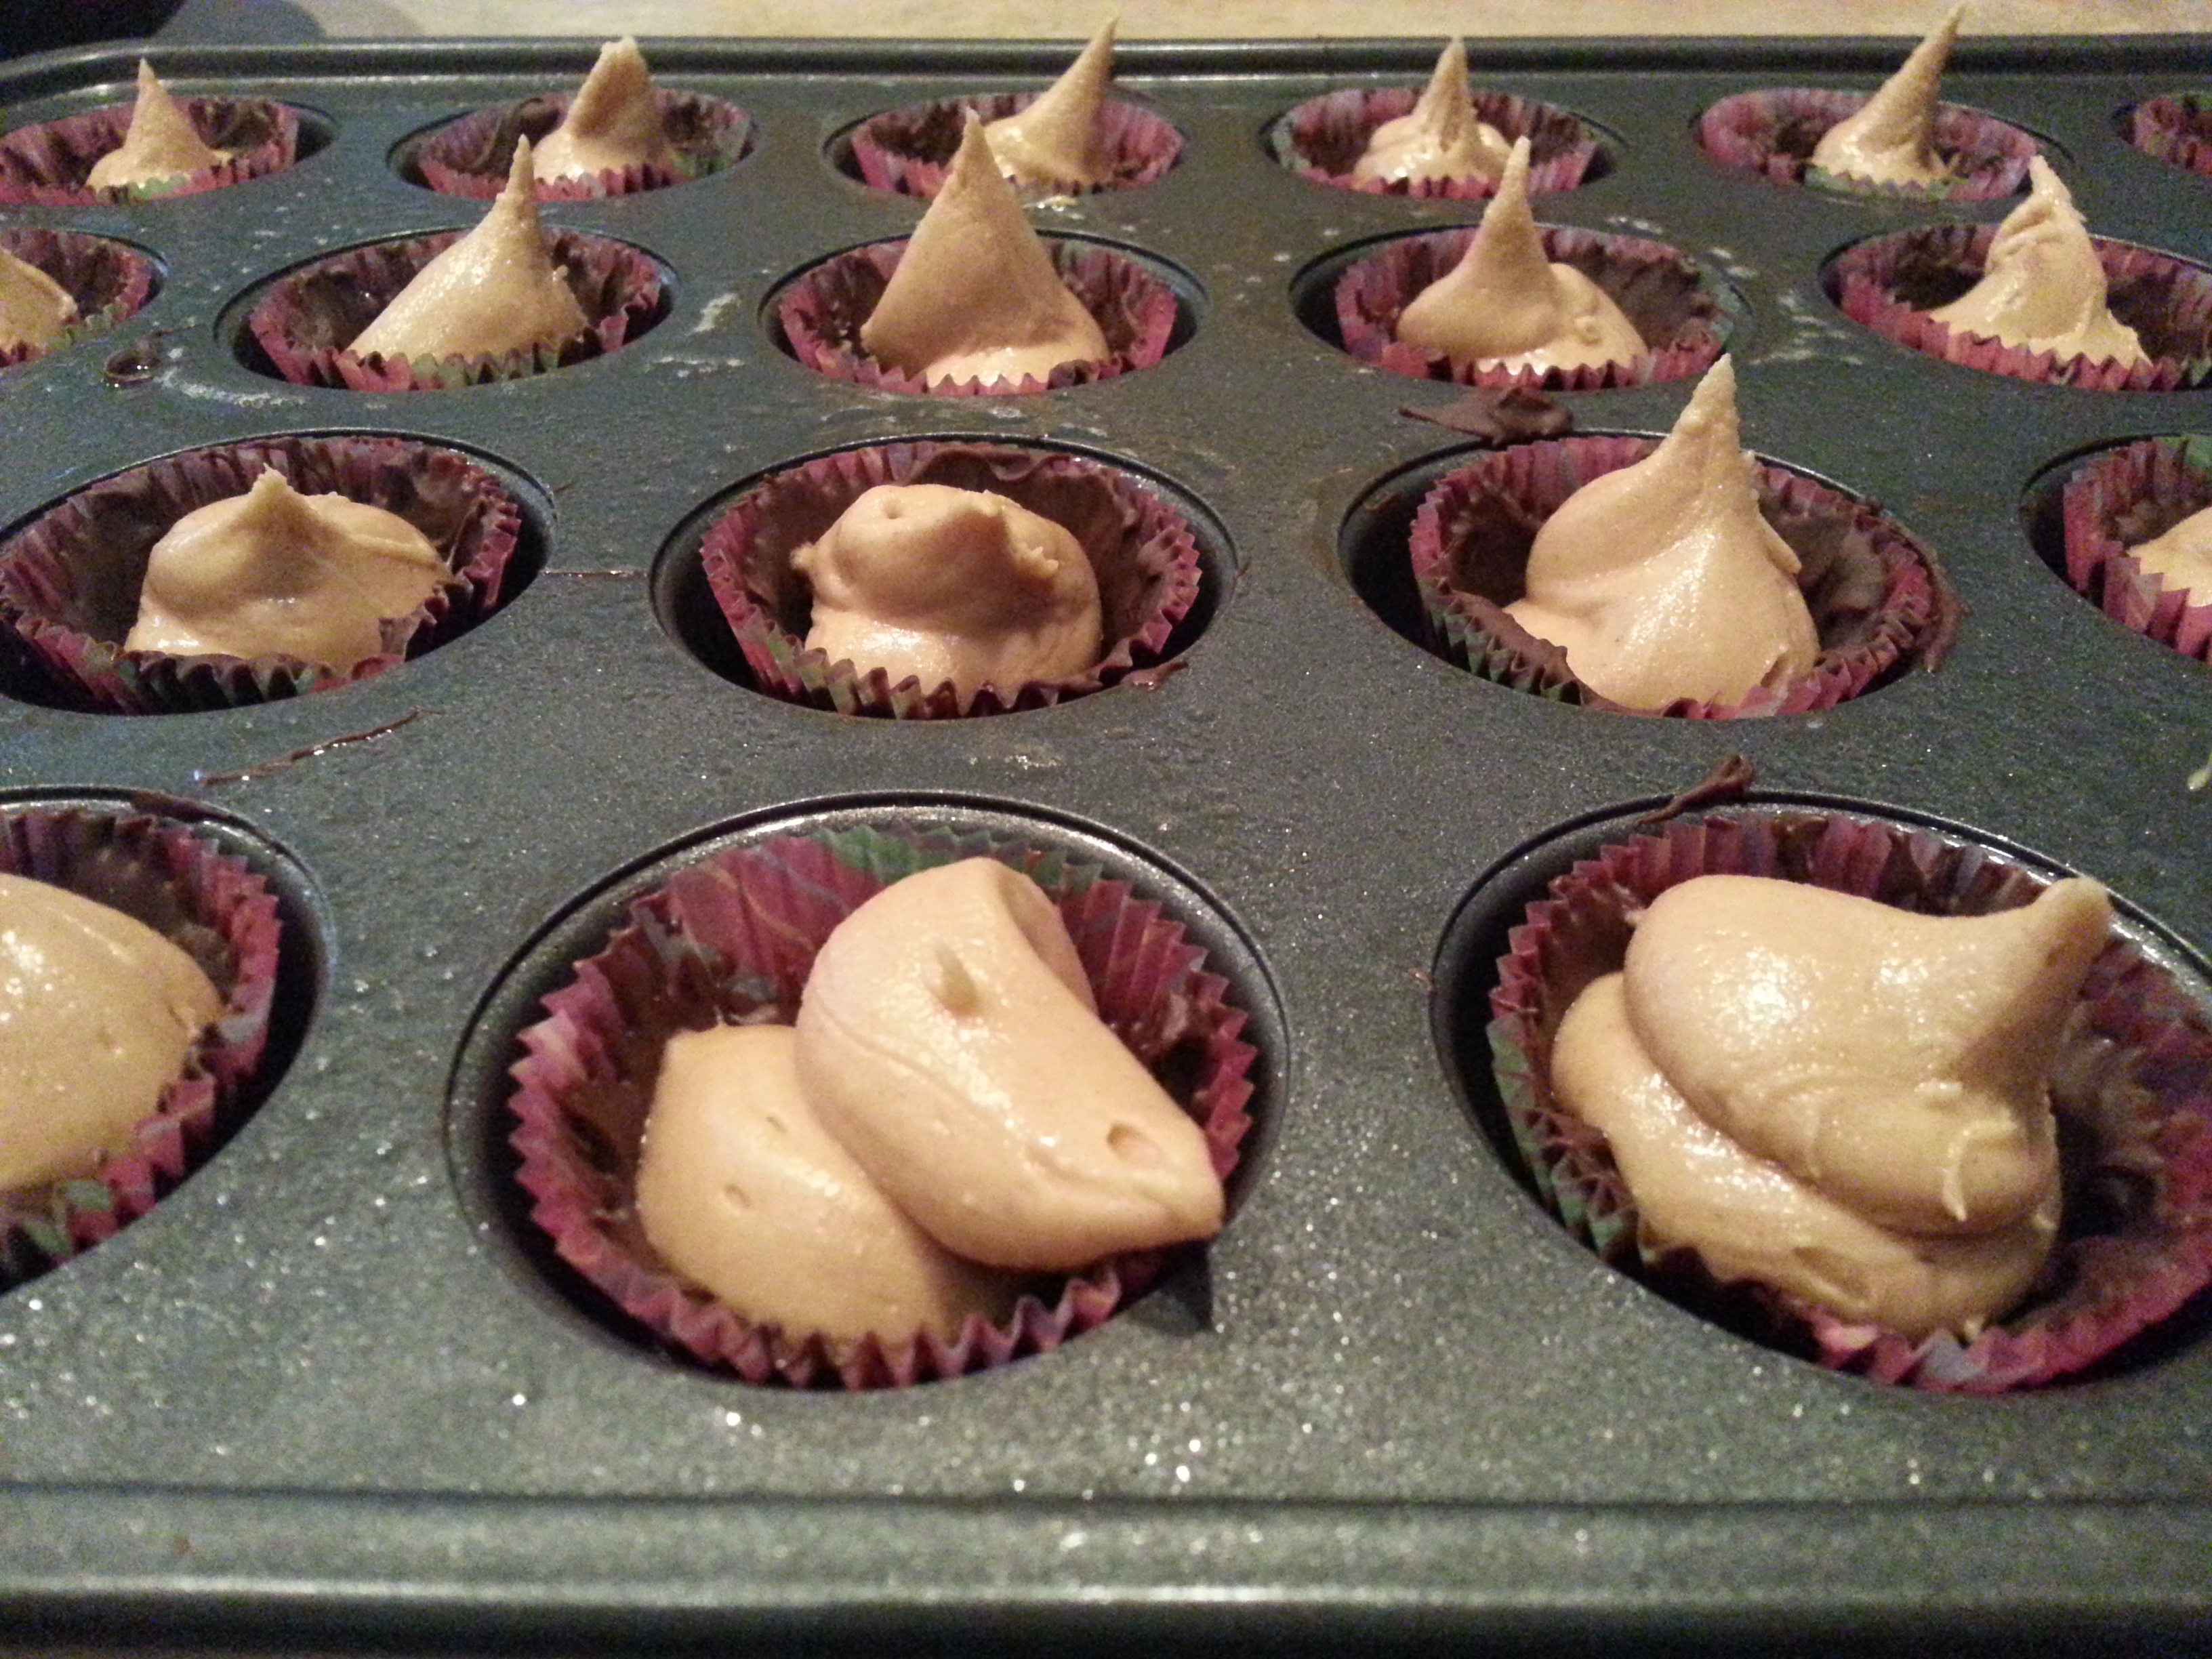
10. Dip your finger in water (I just stood by my sink and used drops from the faucet), and lightly press each peanut butter blob until it’s flat. This was an instruction in the original post and worked surprisingly well. Just keep lightly re-wetting your finger every few blobs so your fingers don’t stick.

11. Melt more chocolate and spoon the chocolate on top. This is the part of the candy people see when they grab a piece, so I tried to sort of swirl the chocolate on top, making sure the peanut butter didn’t get mixed in. For most, that meant plopping the chocolate on top and then carefully spreading it in a swirling motion.
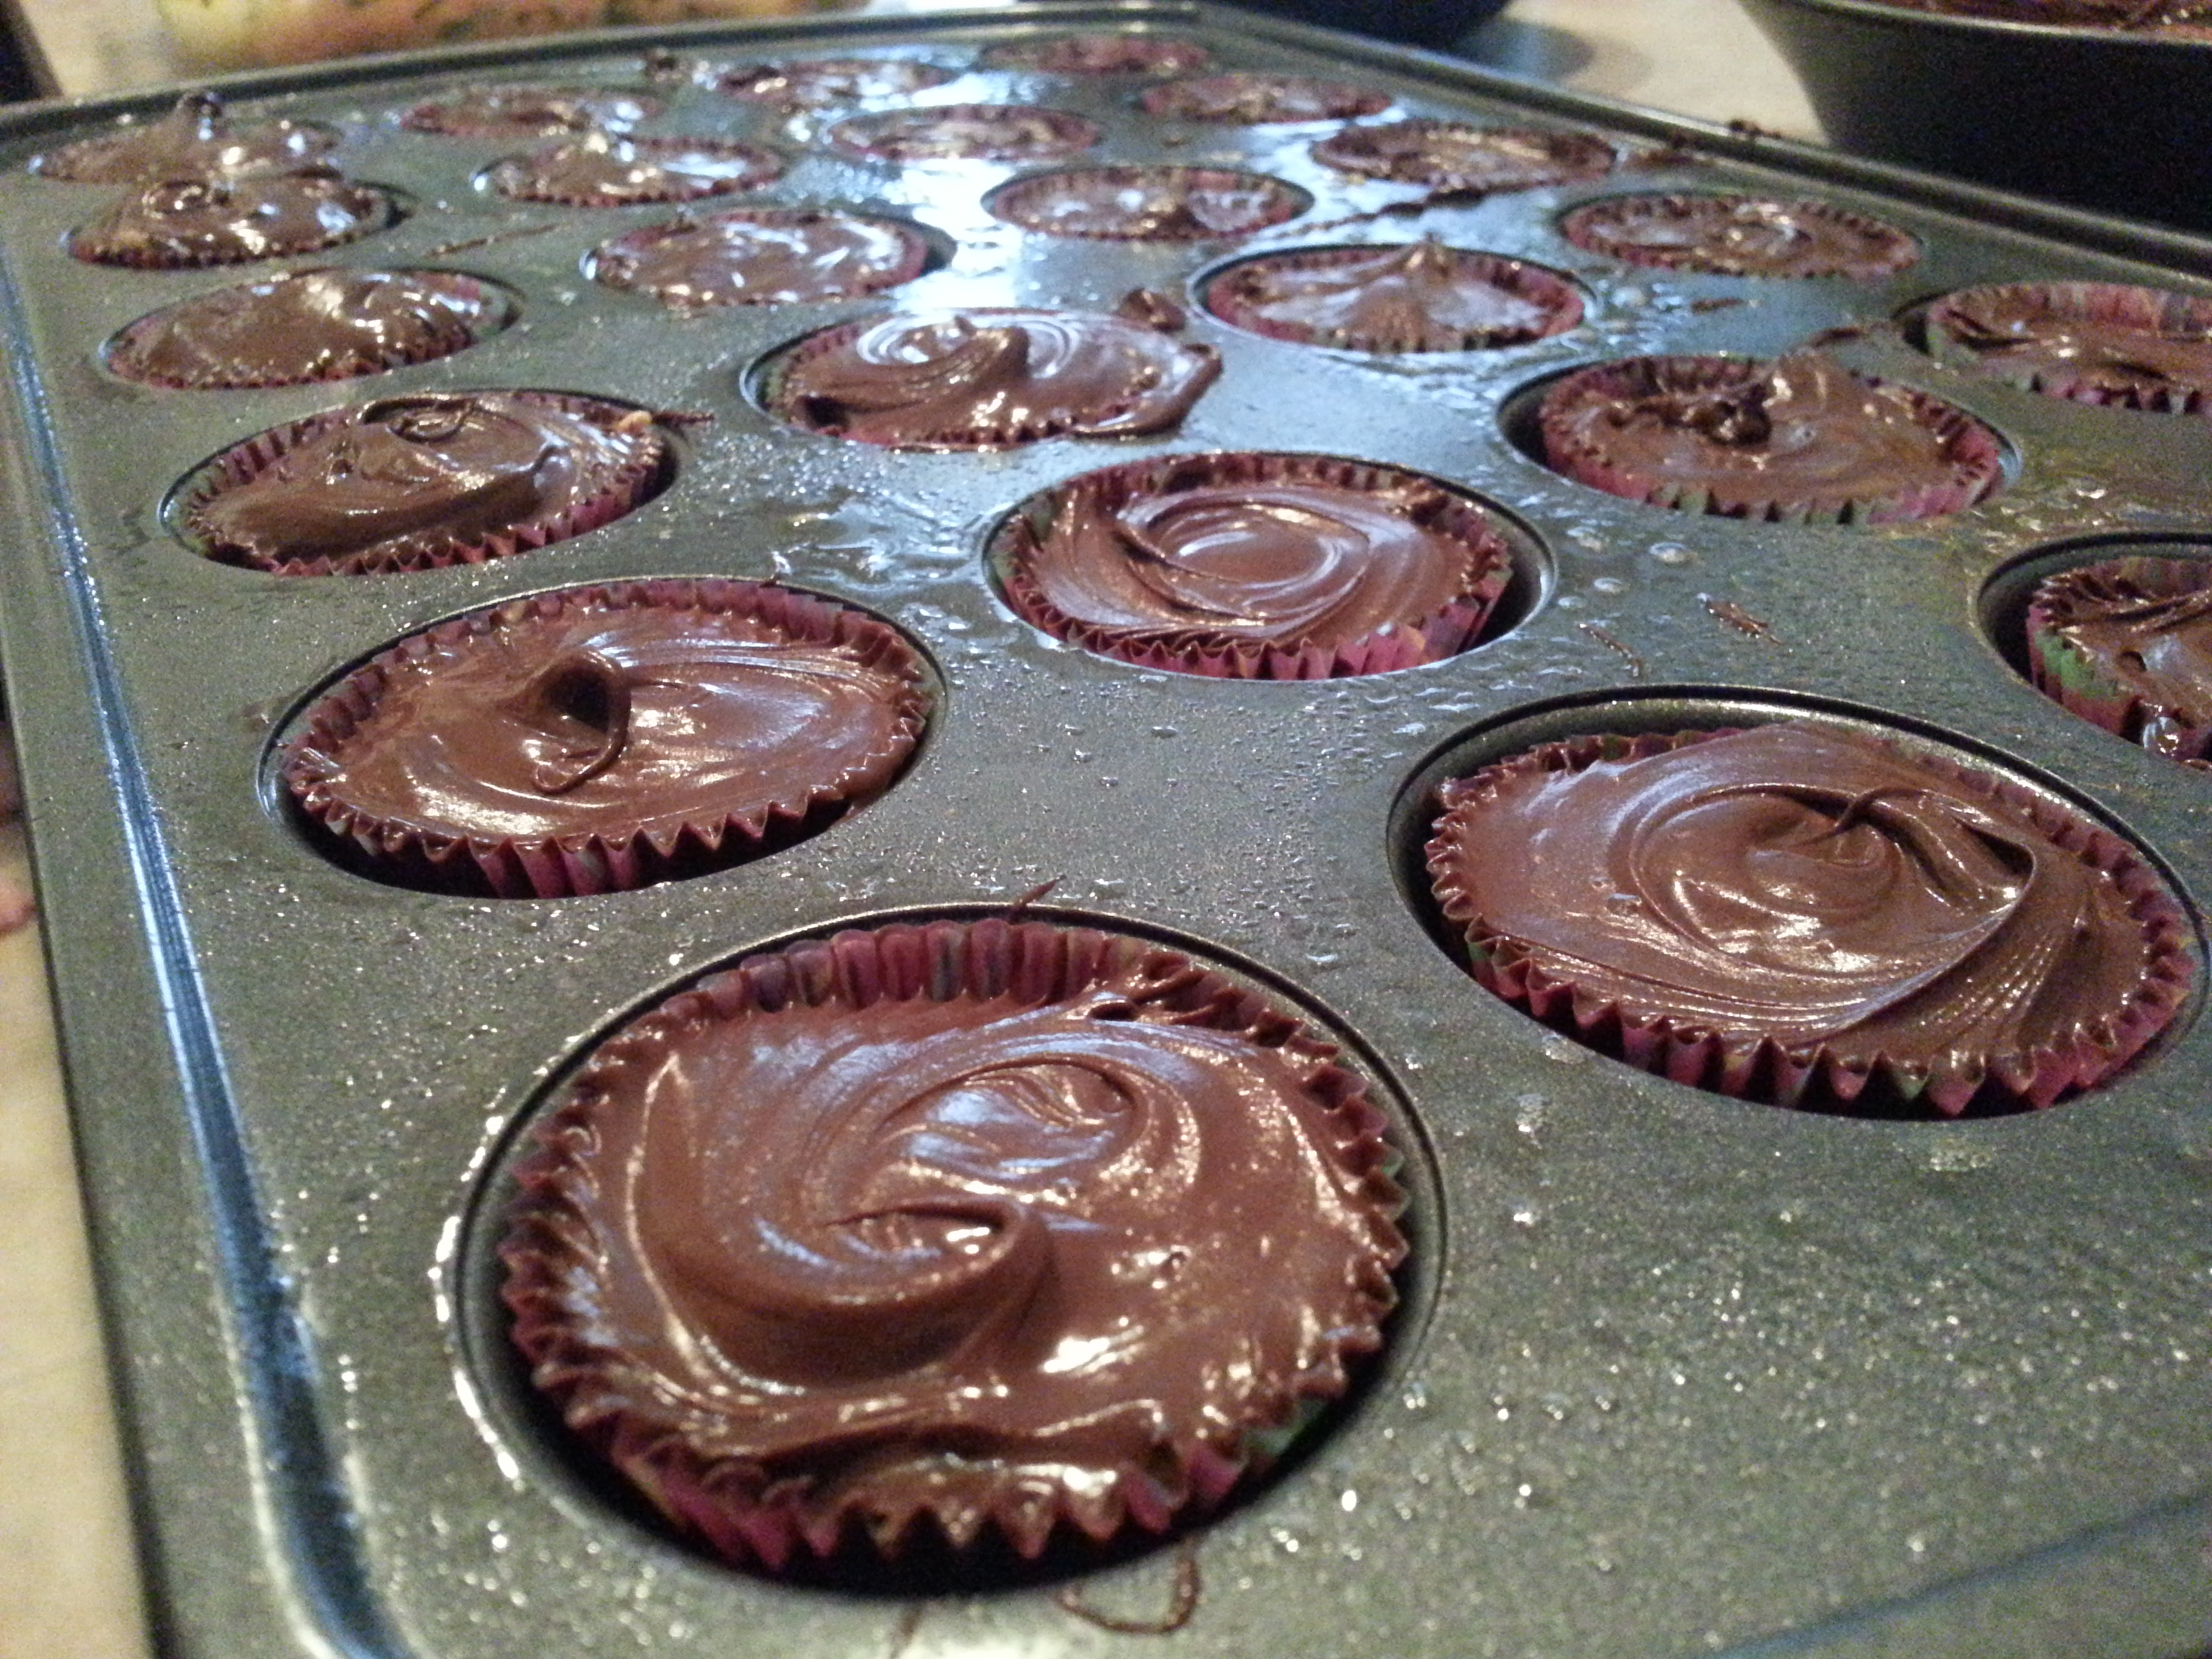
12. Put the tray back in the fridge to set (and to store), and enjoy!
